Showing posts with label Healthy. Show all posts

Wednesday, April 22, 2015

Jambalaya

I found this recipe on my computer I had written nearly a year ago for 21-Day Fix but never posted it- aahhh! So I made it the other night for dinner and figured now would be a good time to share it with you- Better late than never, right? :)


I personally love this recipe because it gives you tons of flavor- who says eating right has to be bland?!? Plus, you can customize it to your liking- you can choose the proteins and control the heat level. And, everything cooks in ONE pan, so it makes for easy clean-up!


This one is definitely going back on our regular meal rotation now that I’ve rediscovered it! Hope y’all enjoy it too.

Jambalaya


Yield: 4-6 servings
21 Day Fix Portions (per serving): 1 yellow, 1 red, 1 green


Ingredients
  • 1, 8-oz package of  Uncle Ben’s Whole Grain Brown Ready Rice (You can use regular brown rice too- I just like that this cooks in 90 seconds)
  • 4 red containers protein of choice (mix-and-match as desired): diced chicken breast, shrimp, and/or all-natural turkey or pork sausage)
  • 1½ green container (1½ cup) bell pepper (any color), diced
  • 1½ green container  (1½ cup) fire roasted diced tomatoes
  • 1 green container (1 cup) onion, chopped
  • 3 garlic cloves, minced (or grated)
  • Original hot sauce (to taste)
  • Dash of Worcestershire sauce (I recommend Lea & Perrins becuase its all natural ingredients and not made with corn syrup- read your labels!)
  • 2 tbsp pre-made or homemade cajun seasoning (2 tsp each garlic powder, onion powder, paprika, dried thyme, black pepper, cayenne pepper, plus ½ tsp salt)


Directions

  1. In a saute pan, brown protein over medium-high heat (I would do sausage first, then chicken, then shrimp). Be sure to season the chicken and shrimp with cajun seasoning. *You might need to add a little Extra Virgin Olive Oil to your pan in between meats*. Remove proteins from pan and place in a bowl and cover with foil to keep warm
  2. In the same pan, drizzle a little more EVOO and reduce heat to medium/medium-low. Saute onions, peppers, and garlic until tender. Season with hot sauce as desired.
  3. Add the tomatoes into the pan and allow the tomatoes to heat through.
  4. Cook the rice according to package instructions, then add it to the pan.
  5. Add the cooked protein back to the pan as well
  6. Give it a good stir so that everything is evenly combined. Add more hot sauce and worcestershire to taste.
  7. Use a GREEN container (or 1 cup) to scoop out each portion

Friday, March 20, 2015

Tomato Bacon Soup

In the past week, the temperatures have started to warm up and I am loving the first signs of Spring. But, I’m not yet ready to bid farewell to my favorite soup- in fact, I think this soup works year-round.

This tomato bacon soup is a modified version of a recipe I found a few years back in a Rachael Ray magazine and has become a favorite in our household. It makes for a wonderful, hearty dinner, especially when paired with a gooey grilled cheese sandwich. Enjoy!

Yield: 8-10 servings
Fix Portions (per 1 cup serving): 1 green, ¼ yellow, ¼ red

Ingredients
  • 4 slices turkey bacon (look for the kind without nitrates and preservatives)
  • 1 large (32oz) can of crushed tomatoes (I recommend the Hunts All Natural kind with basil added. If you can't find that, regular crushed tomatoes are fine too)
  • 1 can cannellini beans, drained and rinsed
  • 1 fresno (red) chile pepper, finely chopped (remove most of the ribs and seeds- while this is more of a mild/medium heat level, you don’t want the spice to overpower the soup. You just want the flavor the pepper gives because in my opinion it really makes the dish!)
  • 1 onion, chopped
  • 2 garlic cloves, grated
  • ½ quart chicken stock (all natural, organic, low sodium is best)
  • ¼ cup finely chopped fresh basil and parsley (best with both, but either or works best too)
  • Bay leaves (i just use a sprinkle of dried, but you can add a whole fresh bay leaf if you prefer)


Directions
  1. In a dutch oven, brown the bacon. Remove from pan. Finely chop.
  2. Add the chopped onion, garlic, and fresno to the same pan and saute until tender (you cook it in the pan drippings, but you might need to add a little EVOO depending on how much grease your bacon yielded. Alternatively, if theres more than 1-2 tbsp of bacon grease, I would remove some before sauteeing the veggies, so the soup isn’t overly greasy… just depends on your bacon that day). Season with salt, pepper, and bay leaves.
  3. Combine all ingredients in a crockpot and cook until heated through and beans are tender- I usually give it at least 3-4 hours on low, but it can cook all day too!

Bonus
I serve this with a grilled cheese on the side for dipping. The BEST cheese with this recipe is Boars Head 3-Pepper Colby Jack. It has a kick to it, so an alternative cheese might be better for kiddos, but its the perfect pairing!

Sunday, March 1, 2015

Italian Tortellini Soup

We have had a stretch of cold weather this past month- freezing rain, ice, snow, and temps in the single digits- brrrrr! Days like that call for a bowl of steaming soup for dinner and this new recipe surely hit the spot!


Yield: 8 servings
21 Day Fix Portions (per 1 cup serving): 1 Yellow, 1 Green, 1 Blue


Ingredients
  1. 1 onion, chopped
  2. 5 garlic cloves, minced
  3. 2 quarts low sodium organic chicken stock/broth
  4. ¼ cup fresh basil, finely chopped
  5. 2 cups spinach leaves
  6. 1 can (28-32oz) crushed tomatoes
  7. 1 can (14oz) diced tomatoes
  8. 2 tbsp pasta (or tomato) sauce of choice (I used Classico)
  9. 1 package refrigerated whole wheat 3-cheese tortellini
  10. ¼ cup shredded parmesan cheese


Directions

  1. Saute, onions and garlic in a little bit of Extra Virgin Olive Oil until tender. Season with a little italian seasoning, salt and pepper.
  2. Add sauteed onions and garlic to the CrockPot along with ingredients 3-8. Cook on low for 3-4 hours, or all day.
  3. Right before dinner time, cook the tortellini according to package instructions (should take about 7 minutes in boiling water). Then add to the soup.
  4. Use a GREEN container (or 1 cup) to portion your soup. Then add the parmesan cheese to each bowl and fold in- adds the perfect final touch!

Friday, February 27, 2015

Sundried Tomato Alfredo


I was watching Chopped on the Food Network and felt inspired to create this dish one night. Hey, sometimes you just feel fancy and want to play in the kitchen...that, and you want eat some comfort food. This will satisfy your comfort food palate with some simple substitutions that make it healthier than a standard alfredo.  I think it turned out great- I secretly wanted to lick the bowl clean (welp, thats not a secret anymore lol). My husband, who is not a fan of alfredo-y dishes (made up a word there) actually really enjoyed this- I will be adding it to our meal rotation. Hope you will too!

Yield: 4 servings
Fix Portions: 2 Yellow (1 yellow, 1 yellow substitute), 1 green, 1 blue, 1 red

Ingredients
  • ½ box whole grain noodles (I used elbows, but any thicker style noodle will work)
  • 1 cup mushrooms, chopped
  • ½ jar sundried tomatoes in olive oil, julienne cut
  • 2 chicken breasts, diced
  • ½ cup shredded parmesan cheese
  • ½ cup mozzerella cheese
  • ½ cup milk
  • 2 tbsp flour (whole wheat or all-purpose. I usually shy away from white flour but its hardly any here- just works as a thickening agent for the sauce)
  • ¼ cup fresh basil, chopped
  • 2 garlic cloves, minced
  • Red pepper flakes (optional and to taste- gives it a little kick)
  • Salt and pepper

Directions

  1. Cook noodles according to package instructions. **Reserve ¼ cup starchy cooking water before draining noodles**
  2. Meanwhile, drain and rinse your sundried tomatoes- but save the oil from the jar- you will need it!
  3. Spoon 1-2 tbsp of the olive oil from the jar of sundried tomatoes into a skillet.
  4. Saute sundried tomatoes, mushrooms, and garlic until tender. Season with black pepper and red pepper flakes (do not add salt or the mushrooms will not brown) and stir in the chopped basil. Remove from pan and cover with foil.
  5. Add a little more of the sundried tomato oil to your pan. Dice chicken and season with salt and pepper (and a little garlic or onion powder if you want). Saute chicken until cooked through, then remove from pan and add to bowl with the veggies.
  6. In the same skillet, add either more olive oil or 1-2 tbsp unsalted butter. Whisk in flour to create a roux. Add milk to the pan and stir often until the milk bubbles and thickens a bit.
  7. Stir in shredded cheeses, using a figure-8 motion until the cheese is dissolved. Taste your sauce and adjust the seasonings as desired (salt, pepper, garlic powder, red pepper flakes, etc.)
  8. Add your cooked, drained noodles to your bowl of chicken and veggies. Add a ladel-full of starchy cooking water, then add your sauce (I would add it a ladel-full at a time so you get the right sauce ratio- no one wants swimming noodles). Stir to combine.
  9. Use your green 21-day fix container (or measure approx 1 cup of the dish) to portion your meal. Serve with a garnish of parmesan cheese and basil if desired (makes it pretty).

Thursday, January 8, 2015

Lasagna

You can have lasagna on 21-Day Fix??? Yes, yes you can!

I have a favorite lasagna recipe I always make for dinner parties, potlucks, taking people meals after they have babies, etc. It just needed a little modifying so that I could enjoy it myself, while keeping in line with the 21-Day Fix eating plan.

Enjoy!

21-Day Fix Portions:
Okay, so here’s what the official eating plan tells you to do when eat a meat lasagna- It says to portion it using a green container but count it as 2 yellow, 1 red. With this particular recipe, it seems more logical in my head to still use the green container for portion control, but instead count 1 yellow, 1 red, 1 green, 1 blue- that’s what I would personally count, but I think you will be fine checking off either of these portion recommendations.

Ingredients
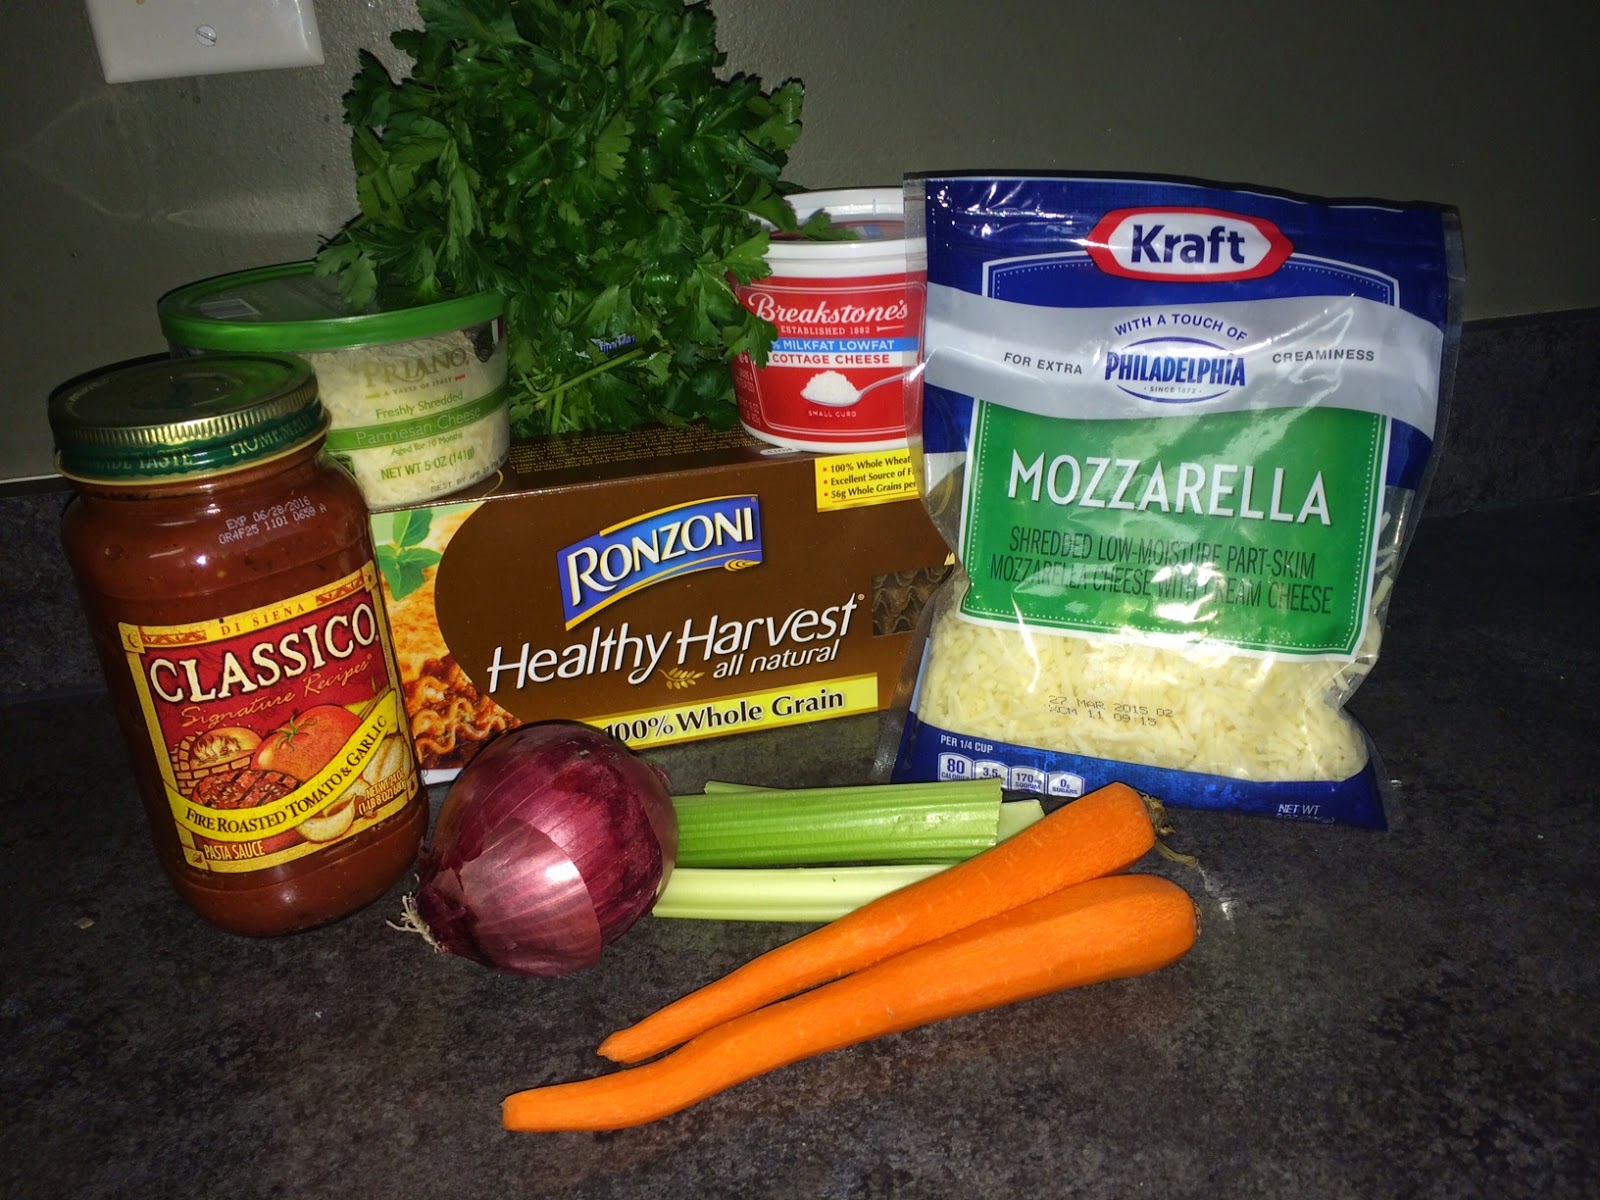
  1. Whole wheat lasagna noodles (8 if you want 2 layers, 12 if you want 3 layers)
  2. 1 lb lean ground turkey
  3. 1½ jars clean pasta sauce (I like Classico. If you want it extra saucy, use 2 full jars. If you like less sauce, you can get by with 1 jar)
  4. 1 carton cottage cheese
  5. 1 8oz. package shredded mozzarella or italian blend cheese
  6. ¾ cup real shredded parmesan cheese
  7. 1 egg
  8. 1 green container (combined) finely chopped celery, onion, carrot
  9. 1 clove garlic, finely chopped
  10. ¼ cup red wine (optional, for pan deglazing)
  11. ¼ cup finely chopped parsley
  12. Italian seasoning

Directions

  1. Boil water for noodles (add a splash of extra virgin olive oil so they don’t stick together). Cook noodles according to package instructions.
  2. Meanwhile, in a dutch oven, brown ground turkey. Season with italian seasoning and remove from pan.
  3. Add a drizzle of EVOO to the same pan. Saute vegetables and garlic until tender.
  4. Return the ground turkey to the pan. Add the wine to deglaze the pan and allow wine to reduce.
  5. Stir in pasta sauce and parsley and simmer until heated through. Feel free to adjust sauce seasonings to taste (you can use garlic powder, onion powder, oregano, etc.)
  6. In a separate bowl, whisk the egg until well beaten
  7. Add the cottage cheese, 1 cup of the mozzarella, ½ cup parmesan, and a generous sprinkle of italian seasoning. Stir to combine with the egg until everything is well blended.
  8. When the noodles have finished boiling, rinse with cold water and pat dry completely using kitchen towels.
  9. Begin the lasagna layering process in a lightly-greased 13x9 pan: Sauce, noodles, cheese mixture, repeat.
  10. Once you have added the final layer, pour any remaining sauce over top. 
  11. Then sprinkle remaining 1 cup mozzarella and ¼ cup parmesan on the top.
  12. Cover with foil and bake at 375 for 45 minutes. Remove the foil and continue cooking an additional 5 minutes or until the cheese on the top is bubbly.

Tuesday, January 6, 2015

ONE PAN Roasted Chicken and Veggies

Ever just feel at a loss for what to do with chicken breast? They are a staple of healthy diets as a lean protein, but plain chicken breast definitely gets old.

I was scrolling through pinterest trying to find some chicken inspiration that didn’t involve drowning it in cream of chicken soup or frying it in flour and breadcrumbs, and then it hit me: just keep it simple- and simple doesn’t have to mean flavorless.

And I had every ingredient I needed on hand already. I whipped up this delicious, 21-day fix approved dinner in about 20 minutes.

This can be adjusted to suit 1 person or a whole family (just alter the amount of chicken and veggies used) and can be customized to whatever flavor profile you desire (see optional variations below).

Plus, dishes are a breeze afterward because its only ONE PAN! That makes this momma happy!


Fix Portions: 1 red (per chicken breast), 1 green (per veggie selected- you can adjust this to however many you have/need), 1 yellow (optional- count if using potatoes or sweet potatoes), 1 orange (for the salad dressing).


Ingredients

  1. 1 boneless, skinless chicken breast (per person)
  2. Veggies of choice (Suggestions: squash, green beans, asparagus, broccoli, carrots; Red potatoes are good too, but remember these aren’t counted as a veggie on 21-day fix)
  3. CLEAN salad dressing (I suggest using one of the dressings in the 21-day fix book or this Bragg brand Vinaigrette is excellent)

Directions
  1. Marinate chicken in vinaigrette (at least 30 minutes, up to 24 hours… If pressed for time, you can skip this step, but the marinating yields more flavor)
  2. Place chicken and veggies in pyrex baking dish
  3. Drizzle chicken and veggies with 1 orange container of vinaigrette of choice
  4. Bake on 450 for 20-25 minutes (until chicken is cooked through)


Optional Variations

For an asian twist, use the asian citrus vinaigrette recipe in the 21-day fix book and pair with veggies like carrots, broccoli, and zucchini. Would be great served over some brown rice!


Interested in trying the 21-Day Fix for yourself? For more information, please click here or visit www.beachbodycoach.com/melheywardfitness